I am switching to AWS CDK
I have been a bit slack on this Cat Feeder IoT project for the last 12 months or so; there have been many challenges I've faced during that time that prevented me from materialising the ideas I had - many of them sounded a little crazy if you've had a conversation with me in passing, but they are not crazy to me in my crazy mind as I know what I ramble about is technically doable.
Examples of the technical related challenges I had were:
-
CloudFormation: the initial version of this project was implemented using CloudFormation for the IaC, here is the repository containing both the code and deployment instructions. If you read the deployment instructions, you will notice there are a lot of manual steps required - e.g. creating 2 sets of certificates in AWS Iot Core in the AWS Console; and copying and pasting values to and from the CloudFormation Parameters and Outputs, even though at the time I made my best efforts to minimise the manual effort required while coding them. It was not a good example to get it up and running especially if you are new to AWS, Arduino or IoT; as I myself struggled at times to deploy my own example.
-
Terraform: I ported the CloudFormation IaC code to Terraform some time last year, you can find it here. Nothing is wrong with Terraform itself; I just keep forgetting to save or misplaced my terraform state files every time I resume this project. In reality I might leverage both Terraform and CDK for the projects/micro-services I create in the future, but it all really depends on what I am trying to achieve at the end of the day.
Deploying the AWS CDK version of this Cat Feeder IoT project
So, the commands below are the deployment instructions taken from the AWS CDK version of this project, you can find it here: https://github.com/chiwaichan/feedmyfurbabies-cdk-iot
git clone git@github.com:chiwaichan/feedmyfurbabies-cdk-iot.git
cd feedmyfurbabies-cdk-iot
cdk deploy

git remote rm origin
git remote add origin https://git-codecommit.us-east-1.amazonaws.com/v1/repos/feedmyfurbabies-cdk-iot-FeedMyFurBabiesCodeCommitRepo
git push --set-upstream origin main
The commands above are all you need to execute in order to deploy the Cat Feeder project in CDK - assuming you have the AWS CDK and your AWS credentials configured on the machine you are calling these commands on; the first group of commands checks out the CDK code which deploys an AWS CodeCommit repository and a CodePipeline pipeline - creates the 1st CloudFormation Stack using a CloudFormation template; and the second group of commands pushes the CDK code into the newly created CodeCommit repository created in the first group of commands, which in turns trigger an execution in CodePipeline and the pipeline deploys the resources for this Cat Feeder IoT project - creates the 2nd CloudFormation Stack using a different CloudFormation template.
The two groups of commands creates the 2 CloudFormation Stacks shown in the screenshot below, the stack "feedmyfurbabies-cdk-iot" provisions the CodeCommit repository and CodePipeline - using the 1st CloudFormation template, and the stack "Deploy-feedmyfurbabies-cdk-iot-deployed-service" provisions the resources for this Cat Feeder IoT project - using the 2nd CloudFormation template.
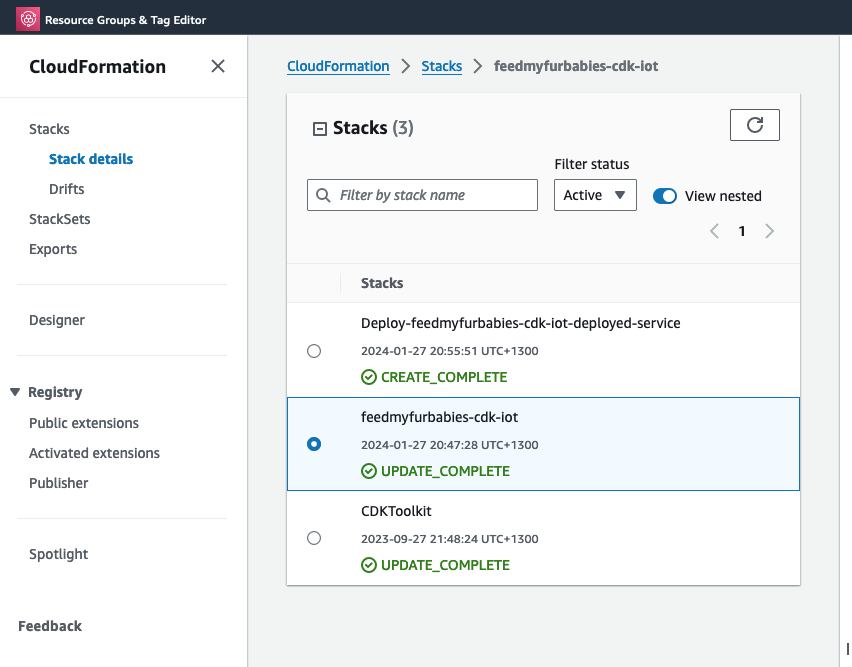
FYI, I did not come up with the pattern I just described above that deployed the two CloudFormation Stacks: one for the pipeline and the other for the AWS resources for this Cat Feeder IoT project; I only came across it during one of those AWS online workshops I was using to learn CDK and noticed this pattern and found it useful, and pretty much decided to adopt it for my projects going forward.
Test out the deployed solution
The resources that are relevant to architecture of this AWS IoT solution are shown in the diagram below.
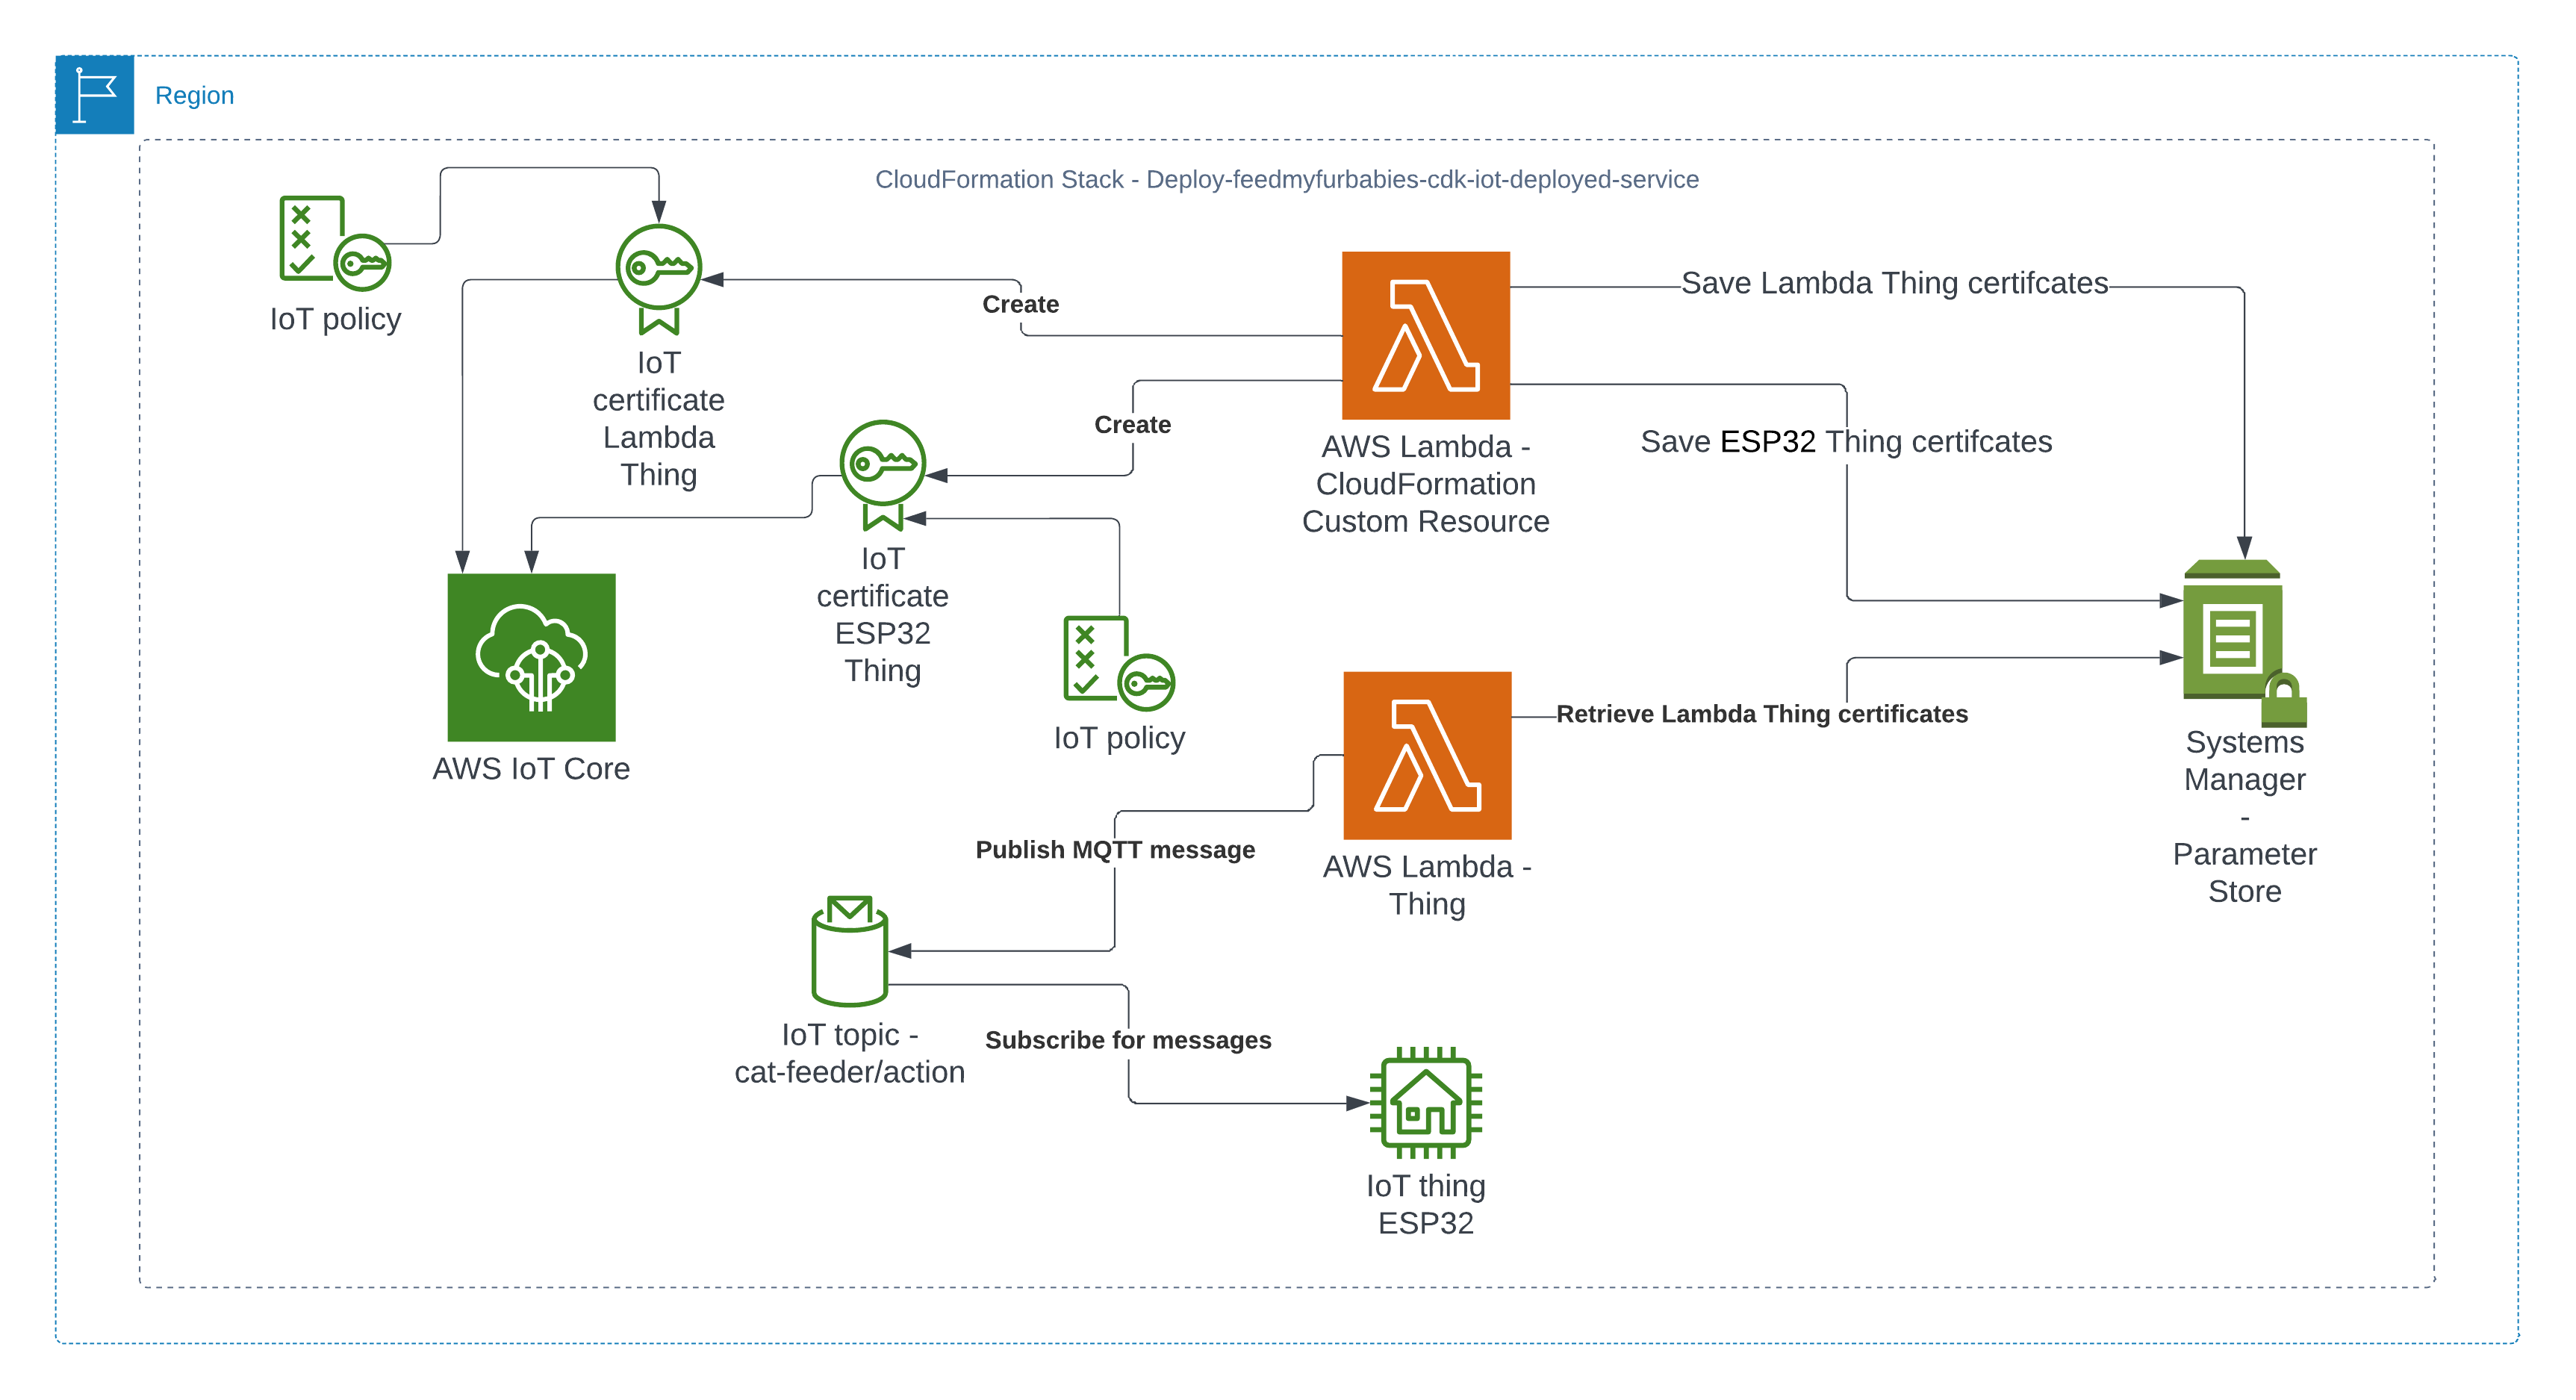
There are 2 sets of certificates and 2 sets of AWS IoT Things and policies deployed by the "Deploy-feedmyfurbabies-cdk-iot-deployed-service":
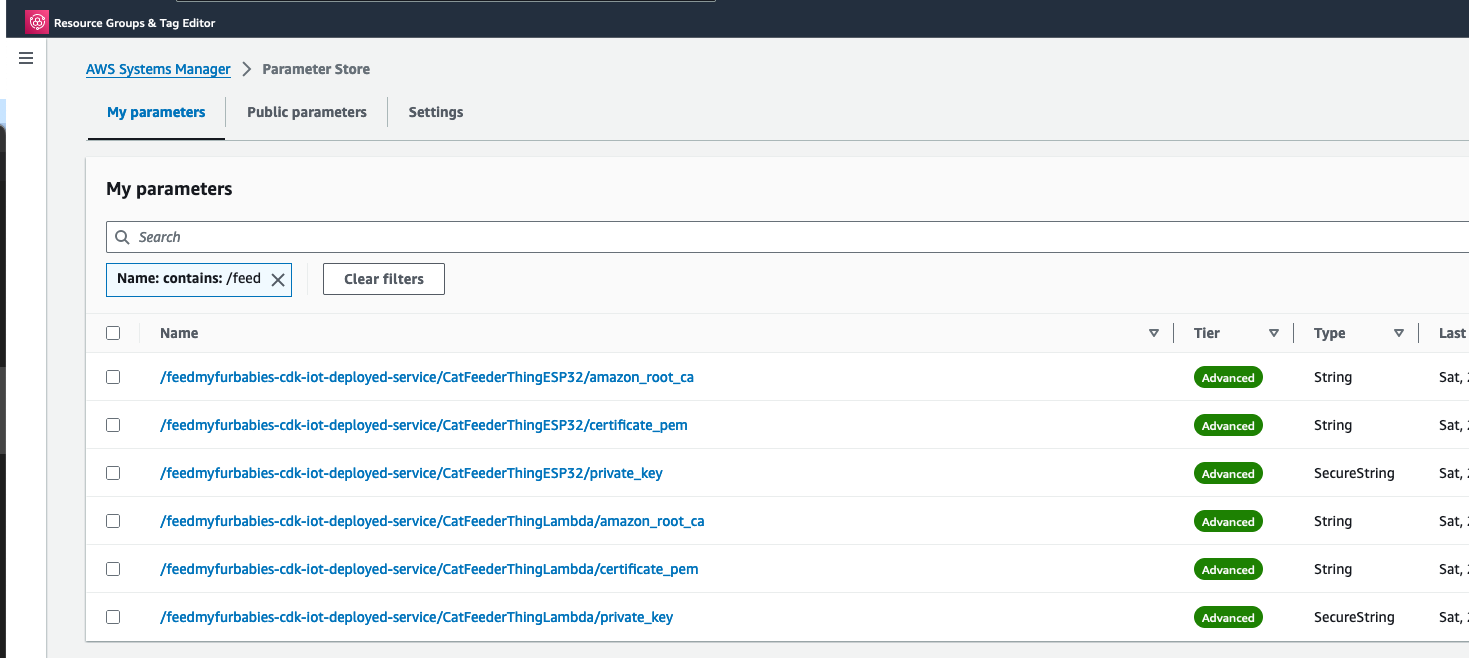
The 1st set of certificates and IoT Thing is hooked up to the AWS Lambda function (Lambda Thing) shown in the diagram, this Lambda function acts as an AWS IoT Thing (uses the certificates saved in Systems Manager Parameter prefixed with "/feedmyfurbabies-cdk-iot-deployed-service/CatFeederThingLambda") and is fully configured as one along with all the neccessary certificates and permissions to send an MQTT message to the "cat-feeder/action" topic in AWS IoT Core; this is a very convenient way to see in action how one could send MQTT messages to AWS IoT Core using Python, as well as a good way to confirm the deployment was successful by testing it out!
Before we invoke the Lambda Thing/function, we need to subscribe to the "cat-feeder/action" topic so that we could see the incoming messages sent by the Lambda function.
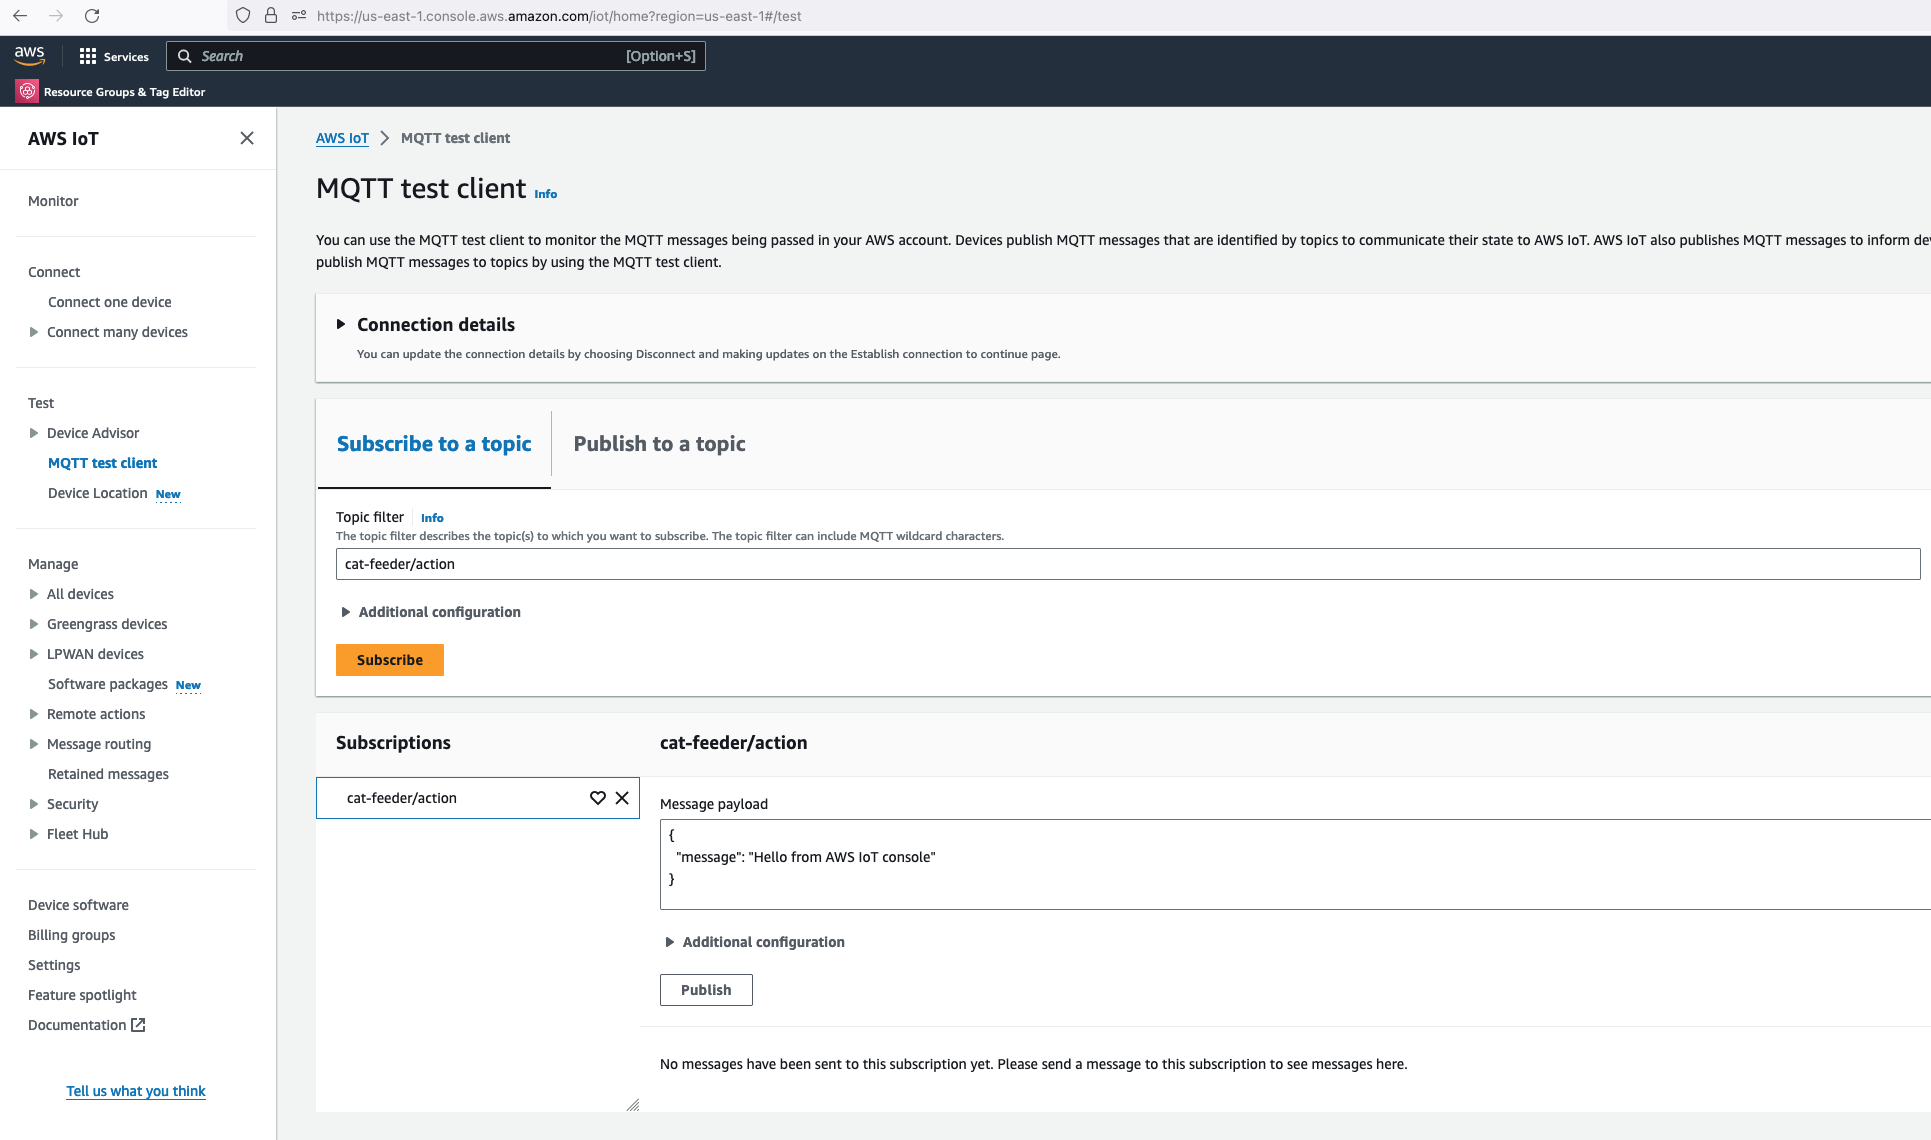
Then we invoke the Lambda function in the AWS Console:
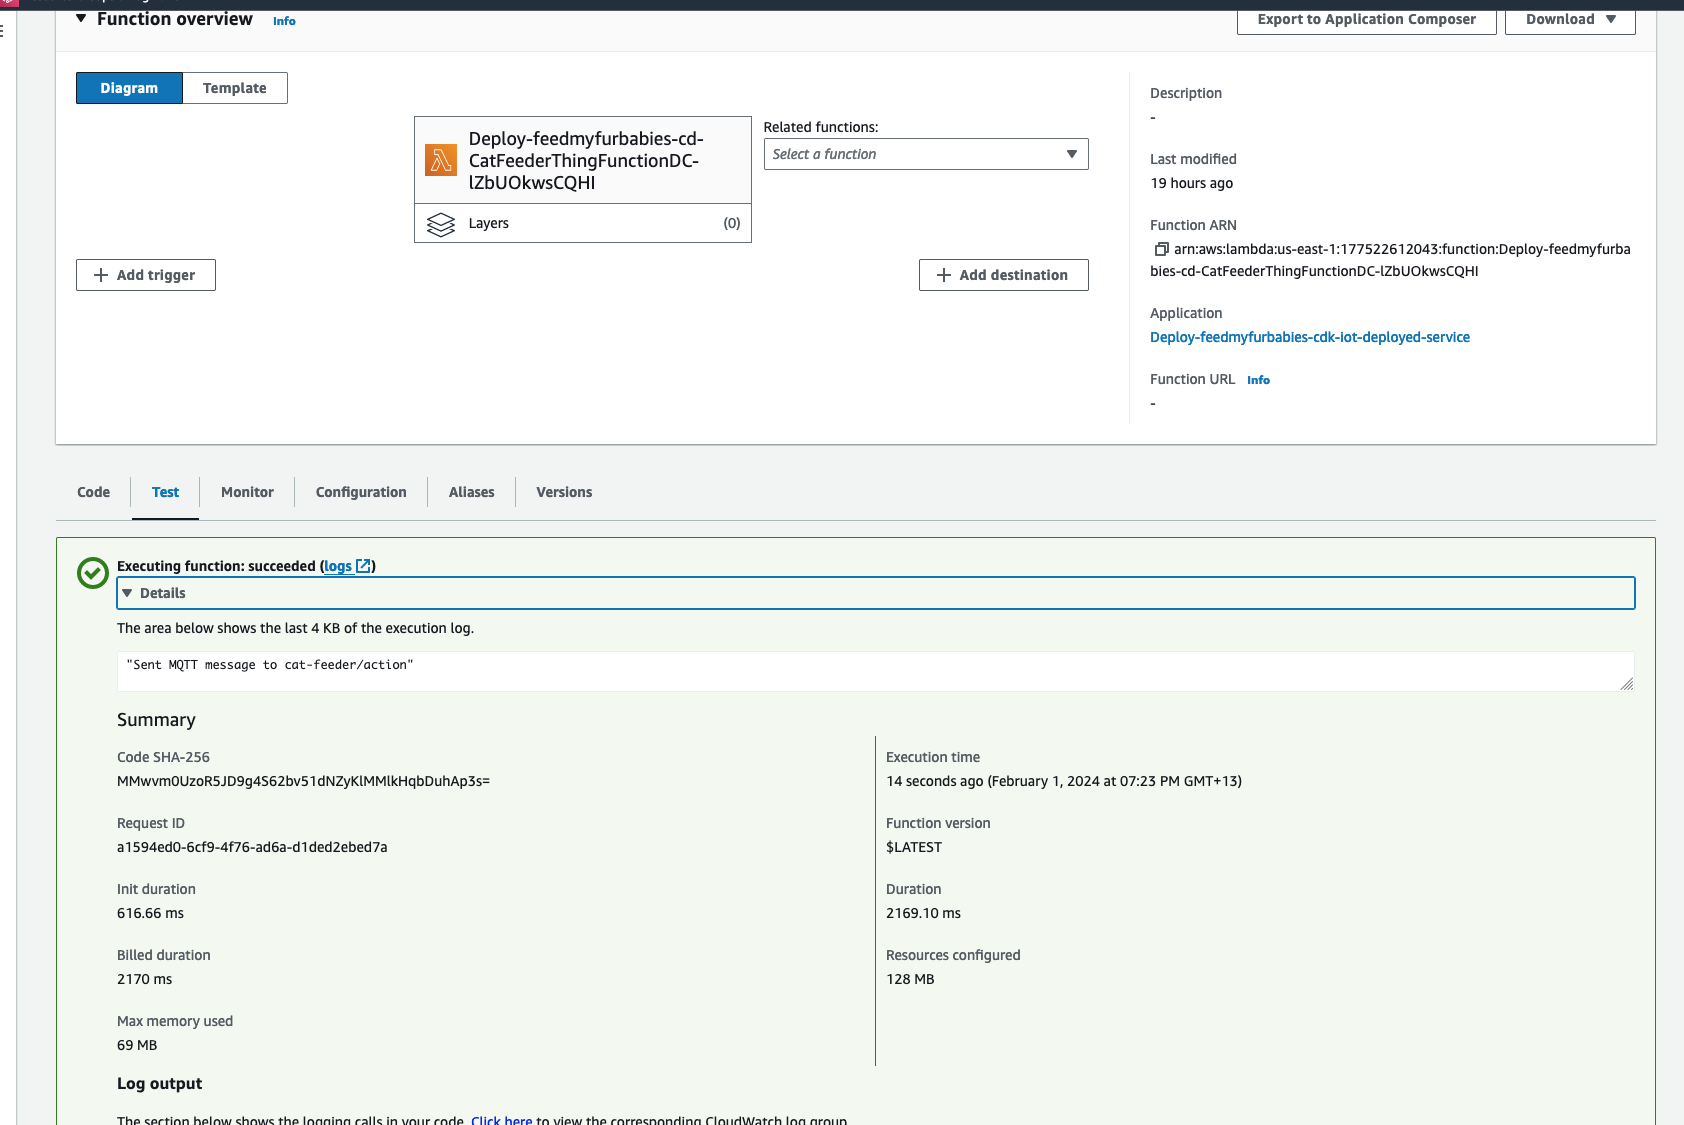
Make sure you get a green box confirming the MQTT message was sent.
The code in the Lambda is written in Python and it sends a JSON payload (the dictionary variable shown in the code below) to the IoT Topic "cat-feeder/action"
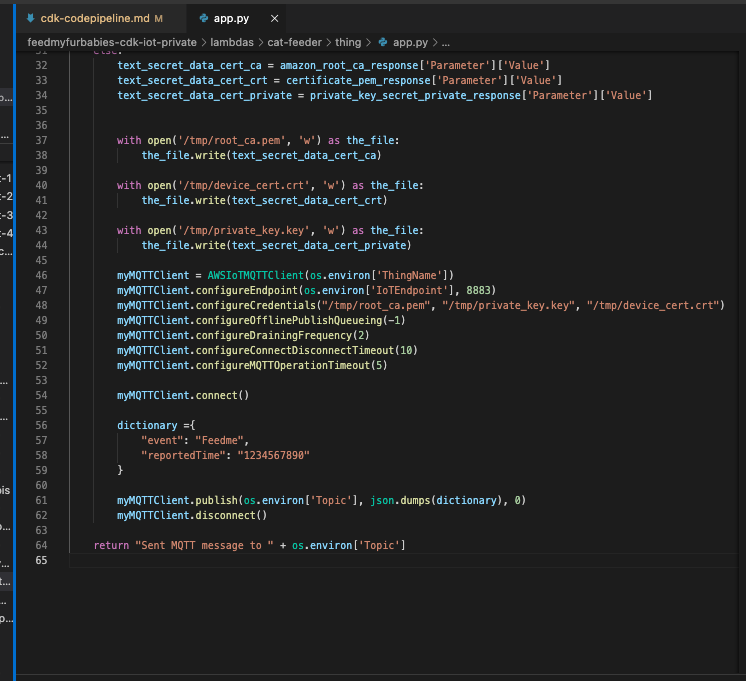
Now lets go back to AWS IoT Core to confirm we have received the message:
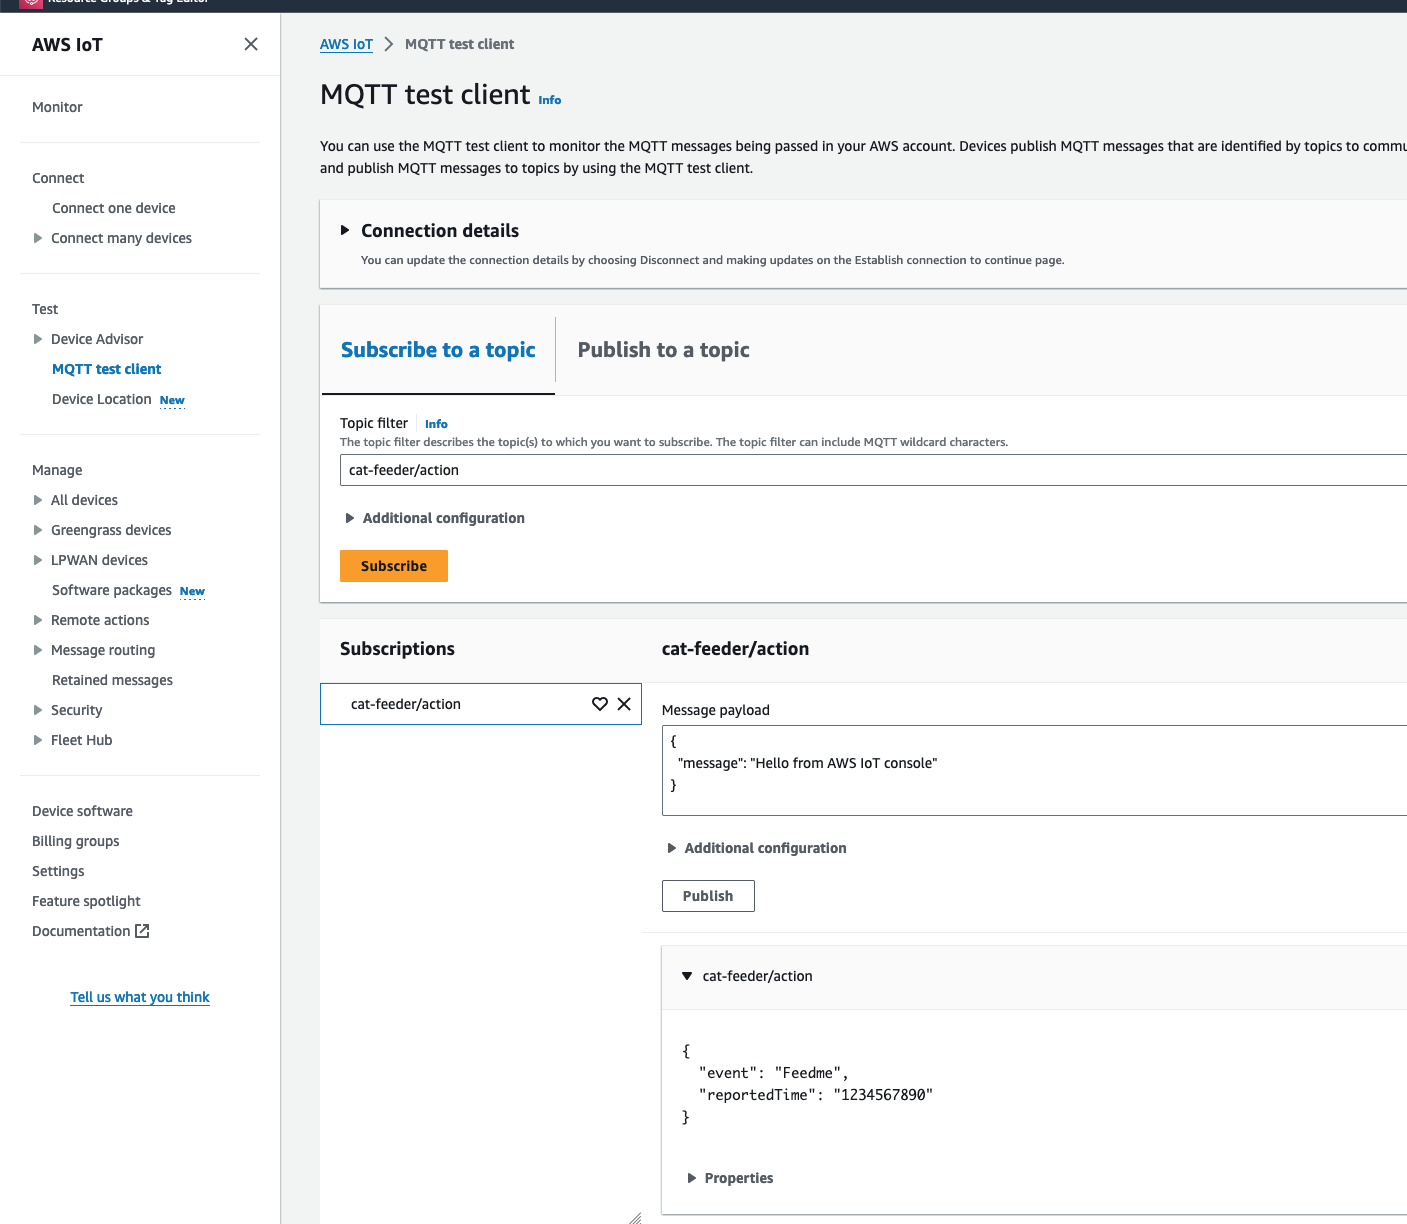
We can see the message received in IoT Core is the dictionary object sent by the Lambda code
Conclusion
Using CDK does not eliminate all the issues you might encounter when using CloudFormation - I have a future blog on creating and using CloudFormation Custom Resources lined up; because at the end of the day CDK just generates a CloudFormation template and handles the deloyment of the CloudFormation Stack for you without you having to manage the CloudFormation Stacks or templates; the intent of this blog is to demonstrate how little effort is required to deploy an AWS IoT solution using CDK, compared with the same architecture I shared in my Github repo 2 years ago but with instructions using a CloudFormation template deployment that was long and tedious in manual steps.
The ultimate aim of change in IaC is to just focusing on building and iterating!
I do often talk too much in my blogs, but in this instance the instructions to deploy this solution for yourself to try out is very minimal, with the majority of the content focused on the resources deployed; and what each resource is for and how they interact with each other.
Extra
You may have noticed that there are 2 sets of certificates deployed in IoT Core and 2 IoT Things in this reference architecture, this is because you can take the 2nd set of certificates (prefixed with "/feedmyfurbabies-cdk-iot-deployed-service/CatFeederThingESP32") and Thing provisioned purely for you to send MQTT message to AWS IoT Core from your own IoT hardware devices / micro-controllers.
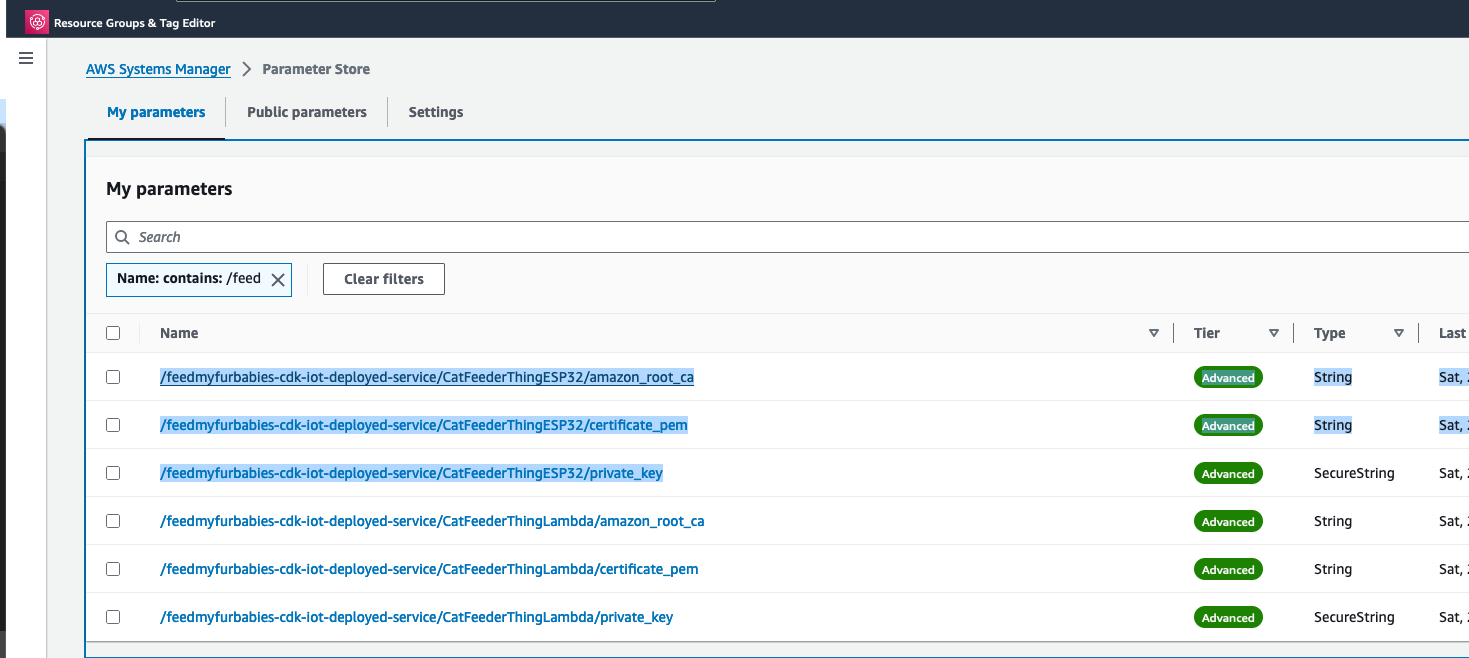
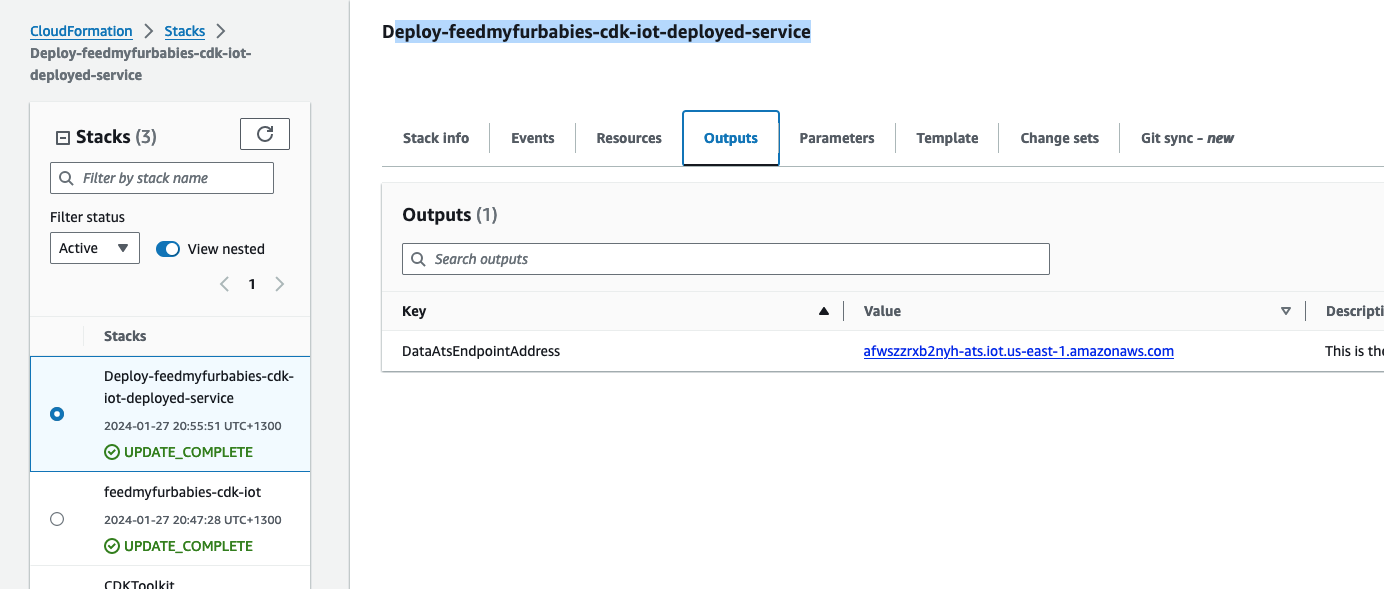
If you want to try it out, you will need to use the IoT Core Endpoint specific to your AWS Account and Region; you can either find it in the AWS IoT Core Console, or copy it from the CloudFormation Stack's Output:
The Lambda Thing we tested above can be used to send MQTT messages to your own IoT device/micro-controller, as the 2nd set of certificates is configured with the neccessary IoT Core Policies to receive the MQTT messages sent to the Topic "cat-feeder/action", and the certificates is also configured with the policies to send MQTT messages to a second IoT Topic called "cat-feeder/states"

I have a future blog that will demonstrate how to do this using MicroPython and a Seeed Studio XIAO ESP32C3 - so watch this space.
